Why Your Microblading Investment Depends on Proper Aftercare
Microblading aftercare ointment is the key to protecting your investment and ensuring beautiful, long-lasting brows. Here’s what you need to know:
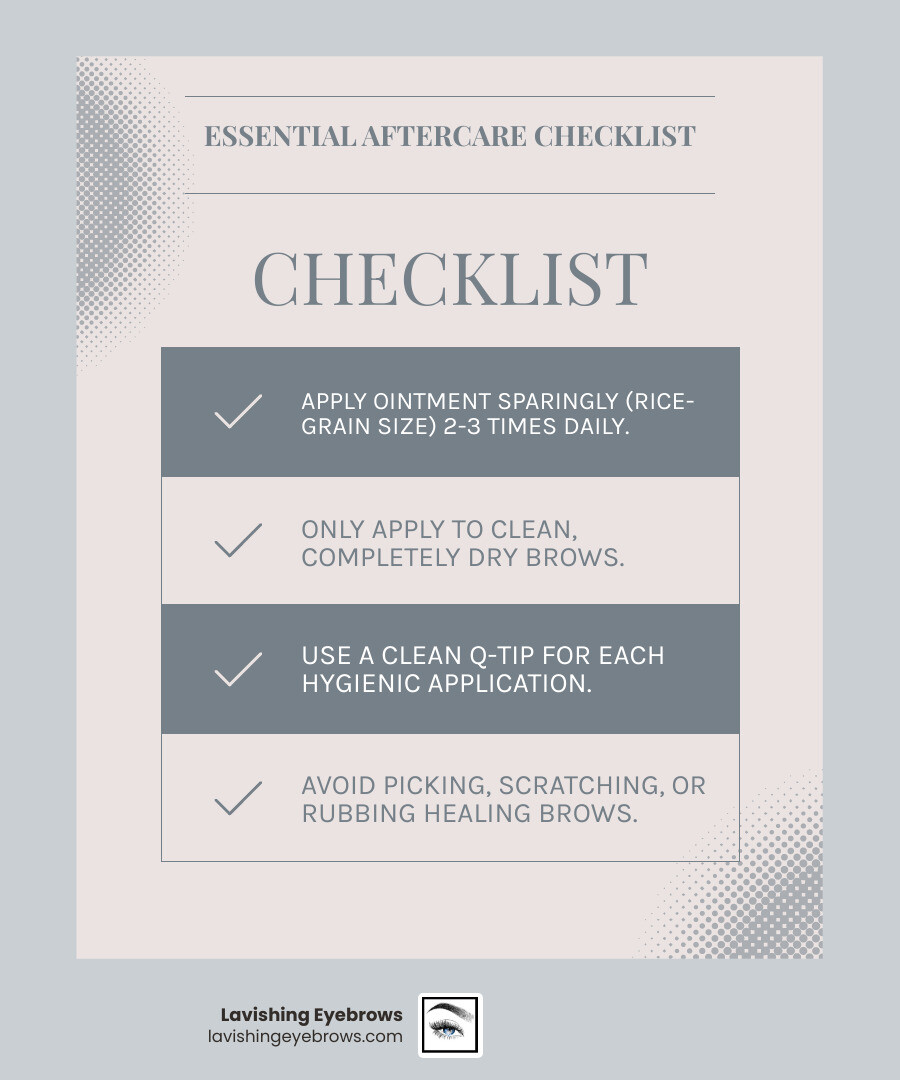
Quick Guide to Microblading Aftercare Ointment:
- What to use: Vitamin A&D ointment, Aquaphor, or artist-recommended products
- How much: Tiny amount (half a rice grain per brow)
- How often: 2-3 times daily for 7-14 days
- When to apply: Only on completely dry, clean skin
- Key rule: Less is more—brows should never look greasy or shiny
You’ve just invested in your dream brows through the microblading procedure. The fine hair strokes look perfect. But here’s the truth: the procedure is only half the battle.
What you do in the next 10-14 days will make or break your results.
Think of microblading like planting seeds in a garden. The artist plants the pigment, but you control whether it takes root. Skip the aftercare, and you risk infection, patchy fading, and premature pigment loss. Follow it correctly, and you’ll enjoy vibrant, natural-looking brows for 1-2 years.
The most critical tool in your aftercare arsenal? A simple ointment.
This guide walks you through everything you need to know about microblading aftercare ointment—what to use, how much to apply, when to worry, and the mistakes that can ruin your results.
Why Ointment is Essential for the Microblading Healing Process
Imagine a tiny, delicate wound on your skin. That’s essentially what microblading creates—hundreds of microscopic incisions where pigment is deposited. Just like any wound, these areas need protection and care to heal properly. That’s where microblading aftercare ointment steps in, playing a starring role in your Microblading Healing Process.
Our aftercare ointment serves multiple crucial functions:
- Protective Barrier: Immediately after your microblading session, your skin is vulnerable. The ointment forms a gentle, breathable shield over your newly microbladed brows. This barrier helps to protect the delicate skin from environmental aggressors, dust, and potential irritants.
- Prevents Scabbing: While some scabbing is a normal part of the healing process, excessive or thick scabs can lead to poor pigment retention. The ointment helps keep the skin supple and hydrated, minimizing the formation of large, hard scabs that might pull out precious pigment when they fall off. Gentle blotting of lymph fluid in the first few hours also aids in preventing heavy scabbing.
- Locks in Pigment: By keeping the skin moisturized, the ointment creates an optimal environment for the pigment to settle into the dermal layer. This “wet healing” approach, often favored by artists, can contribute significantly to better color retention and vibrancy, ensuring those beautiful hair strokes remain crisp and defined.
- Moisturizes Healing Skin: The microbladed area can become dry, tight, and flaky as it heals. The ointment provides much-needed moisture, alleviating discomfort and supporting the skin’s natural regeneration process.
- Reduces Itching: Itching is a common, albeit annoying, symptom during healing. A well-hydrated skin surface is less prone to intense itching, helping you resist the urge to scratch, which could damage the healing skin and dislodge pigment.
Wet vs. Dry Healing: Understanding the Approaches
You might hear about “wet healing” and “dry healing” methods. Dry healing typically involves keeping the brows completely dry, relying on the body’s natural healing. Wet healing, conversely, incorporates gentle cleansing and the application of an aftercare product like an ointment. While some variations exist, most reputable artists in the Temecula, Menifee, and Corona areas, including us at Lavishing Eyebrows, recommend a form of wet healing with specific aftercare products. This method has proven effective in promoting better pigment retention and a more comfortable healing experience for most clients.
It’s paramount to understand that failure to follow aftercare instructions can result in scarring, infections, pigment loss, or discoloration. We’ve fine-tuned our aftercare protocols through years of experience to ensure you achieve the best possible results. Always follow your artist’s specific advice, as their recommendations are custom to their technique and your individual skin type.
Choosing the Right Microblading Aftercare Ointment
The market is flooded with various aftercare products, but not all are created equal. Choosing the right microblading aftercare ointment is crucial. We always provide our clients with detailed instructions and often recommend specific professional-grade formulas or readily available options that we know work best with our techniques.
What to Look For: Key Ingredients for Healing
When selecting a microblading aftercare ointment, we look for ingredients that support healing, provide a protective barrier, and minimize irritation. Here’s a list of beneficial components:
- Vitamin A & D: This classic duo is frequently recommended for wound healing. Vitamin A aids in skin cell regeneration, while Vitamin D is known for its anti-inflammatory properties, promoting a healthy healing environment. Many artists, including us, recommend keeping the treated area consistently moisturized with Vitamin A&D ointment for 7-10 days, applying it 3 to 5 times daily.
- Shea Butter (Butyrospermum Parkii): A natural emollient, shea butter is rich in vitamins and fatty acids. It’s excellent for moisturizing and soothing dry, irritated skin, and its anti-inflammatory properties can help reduce redness and swelling.
- Grape Seed Oil (Vitis Vinifera): A lightweight oil packed with antioxidants, grape seed oil can help protect the skin from damage, promote collagen production, and support overall skin health during healing.
- Jojoba Oil (Simmondsia Chinensis): This oil closely mimics the skin’s natural sebum, making it highly compatible and less likely to clog pores. It’s deeply moisturizing and helps maintain the skin’s barrier function.
- Petrolatum (Occlusive Barrier): Found in products like Aquaphor and Vaseline, petrolatum creates an effective occlusive barrier. This means it forms a protective seal on the skin’s surface, preventing moisture loss and shielding the wound from external contaminants. When used sparingly, it’s a powerful tool for wet healing.
Ingredients and Products to Avoid
Just as important as knowing what to use is knowing what to avoid. Certain ingredients can irritate sensitive healing skin, degrade pigment, or prolong the healing process.
- Fragrances: Artificial fragrances are common culprits for allergic reactions and irritation, especially on compromised skin. Always opt for fragrance-free products for cleansing and moisturizing your microbladed brows.
- Alcohol: Often found in toners and some cleansers, alcohol can be extremely drying and irritating to healing skin, potentially causing excessive flaking and pigment loss.
- Exfoliants (Glycolic Acid, Retinol, Salicylic Acid): These active ingredients are designed to promote cell turnover but are far too harsh for healing microbladed skin. They can strip away pigment and cause severe irritation or even scarring. Avoid any skincare products containing these ingredients on or near your brows during the healing phase and beyond, as they can cause premature fading.
- Makeup on Healing Brows: Your microbladed brows are open wounds. Applying makeup directly to them can introduce bacteria, leading to infection. It can also interfere with the healing process and cause pigment discoloration. We recommend avoiding makeup on the treated area for at least 10-14 days.
- Harsh Cleansers: Stick to gentle, unscented, antibacterial soaps like Cetaphil or Dial. Harsh cleansers can strip the skin’s natural oils, dry out the area, and potentially affect pigment retention.
- Potential Irritants: Steer clear of any products that contain harsh chemicals, dyes, or known allergens. If you’re unsure about a product, it’s always best to consult with your microblading artist.
How to Properly Apply Microblading Aftercare Ointment
Applying your microblading aftercare ointment might seem straightforward, but precision and hygiene are key to achieving flawless results. “Less is more” is our guiding principle here. We want to protect and moisturize without suffocating the skin.

Step 1: The Pre-Ointment Cleansing Routine
Before you even think about applying ointment, proper cleansing is paramount. This routine ensures a clean canvas for healing and prevents infection.
- Wash Hands Thoroughly: This is non-negotiable. Before touching your brows or any aftercare products, wash your hands with antibacterial soap and warm water for at least 20 seconds. Clean hands prevent the transfer of bacteria to the delicate healing area.
- Use a Gentle, Fragrance-Free Antibacterial Soap: We recommend an unscented, antibacterial soap like Cetaphil or Dial. These are mild enough for sensitive skin and effective at cleaning without stripping.
- Lukewarm Water and Gentle Circular Motions: With clean fingertips, gently wash your eyebrow area using lukewarm water in soft, circular motions for about 10-15 seconds. Avoid any scrubbing, harsh rubbing, or using cloths that could exfoliate the area.
- Rinse Completely: Ensure all traces of soap are rinsed away with lukewarm water.
- Pat Dry with a Clean, Lint-Free Cloth or Paper Towel: Gently pat your brows completely dry. Do not rub. A clean, fresh paper towel is often preferred over a fabric towel to minimize lint and potential bacteria.
- Area Must Be 100% Dry: This is a critical step. Your brows must be completely dry before applying any ointment. Never put a product on a wet or damp tattoo. Applying ointment to damp skin can trap moisture, which can lead to bacterial growth and interfere with proper healing. Give it a few minutes to air dry if needed.
Step 2: The “Less is More” Application Method
Once your brows are clean and dry, it’s time for the microblading aftercare ointment. This is where the “less is more” mantra truly comes into play.
- Amount: We cannot stress this enough: apply a tiny amount. The ideal quantity is comparable in size to half of a grain of rice per eyebrow. Yes, that small! Over-application is one of the most common mistakes and can suffocate the skin, delaying the healing process.
- Thin Layer: Spread a very thin layer of the ointment across the treated area. Your brows should not appear greasy, glossy, or shiny. If they do, you’ve used too much, and you should gently blot away the excess with a clean tissue. The product should be barely noticeable on the area.
- Technique: Use a Clean Q-tip or Finger: For hygienic application, we recommend using a clean Q-tip for each eyebrow. This prevents cross-contamination. If you use your finger, ensure it is freshly washed and clean. Avoid using the same Q-tip or finger for both brows without re-cleaning or getting a fresh applicator.
- Frequency: For most clients, applying the ointment twice per day (morning and night) following your washes is sufficient. Some artists might suggest 3 times daily, especially for drier skin types, but always adhere to your artist’s specific instructions.
- Duration: Continue applying the ointment for approximately 7 to 14 days, or until your brows are no longer scabbing and flaking. The exact duration may vary based on your skin type and how quickly you heal. For very oily skin, some artists recommend using the ointment for only one day to prevent clogged pores.
By diligently following these steps, you’re giving your microbladed brows the best possible chance to heal beautifully and retain pigment effectively.
Common Aftercare Mistakes and How to Recognize Problems
Our goal at Lavishing Eyebrows is for you to walk out with stunning, natural-looking brows that heal perfectly. Protecting your results means not only following our instructions but also recognizing common pitfalls and understanding when a concern might be something more serious.
Common Mistakes with Microblading Aftercare Ointment
Even with the best intentions, it’s easy to make mistakes during the aftercare phase. Being aware of these can save you a lot of grief and ensure optimal healing:
- Over-Application (Suffocating Skin): This is perhaps the most frequent mistake. Applying too much microblading aftercare ointment creates a thick, impenetrable layer that prevents your skin from breathing. This can trap bacteria, delay healing, and even lead to pigment loss. A rice-grain amount per brow is plenty! If your brows look shiny or greasy, you’ve used too much.
- Applying to Wet Brows: We emphasized this in the application steps, but it bears repeating: never apply ointment to wet or damp brows. Moisture trapped under the ointment creates an ideal breeding ground for bacteria, significantly increasing the risk of infection. Always ensure the area is 100% dry after cleansing.
- Using Dirty Hands or Q-tips: Hygiene is paramount. Introducing bacteria from unwashed hands or a used Q-tip can easily lead to infection. Always wash your hands thoroughly before applying ointment, and use a fresh, clean Q-tip for each application.
- Picking or Peeling Scabs: It’s tempting, we know! But picking at scabs or flaking skin is a cardinal sin of microblading aftercare. This can prematurely pull out pigment, lead to patchy results, and even cause scarring. Let scabs fall off naturally. Your skin knows what it’s doing!
- Stopping Aftercare Too Soon: The healing process takes time. While the most intensive aftercare might be for 7-14 days, your skin is still regenerating. Some clients stop applying ointment as soon as the initial flaking subsides. Continue ointment until your brows are no longer scabbing, ensuring the skin is adequately protected throughout the initial healing phase.
Signs of an Allergic Reaction or Infection
While complications are rare, it’s crucial to distinguish between normal healing symptoms and signs of an allergic reaction or infection. Your safety and the health of your brows are our top priority.
Normal Healing Symptoms (expected for the first 1-2 weeks):
- Mild redness and swelling immediately after the procedure.
- Tenderness or soreness.
- Darkening of the pigment initially, followed by fading.
- Light scabbing or flaking.
- Mild itching.
Signs of an Allergic Reaction (often appear within hours to days):
- Intense itching or burning sensation.
- Significant swelling beyond the immediate area.
- Rash, hives, or excessive redness.
Signs of Infection (can appear a few days to a week after the procedure):
- Excessive redness or swelling that worsens after the first 24-48 hours.
- Prolonged pain or tenderness that doesn’t subside.
- Yellow or green discharge (pus) from the treated area.
- Fever or chills.
- Warmth radiating from the brow area.
If you suspect an allergic reaction or infection, please don’t hesitate. Contact your healthcare provider immediately. You can also review common signs of a tattoo infection for further information. We also encourage you to reach out to us at Lavishing Eyebrows so we can provide guidance and assess the situation. Understanding Microblading Risks is part of being an informed client, and we’re here to help you steer any concerns.
Frequently Asked Questions about Ointment and Healing
We understand you’ll have questions as your beautiful new brows heal. Here are some of the most common inquiries we receive about microblading aftercare ointment and the healing process.
Can I use common products like Aquaphor or Vaseline for microblading aftercare?
Yes, absolutely! Many artists, including us, often recommend readily available and widely trusted products like Aquaphor and Vaseline for microblading aftercare. These are popular choices for several reasons:
- Occlusive Properties: Both Aquaphor and Vaseline are petrolatum-based, meaning they create an effective occlusive barrier on the skin. This barrier helps to lock in moisture, prevent dehydration, and shield the delicate healing skin from external contaminants.
- Gentle Formulation: They are typically free from fragrances, dyes, and other common irritants, making them suitable for sensitive, healing skin.
- Accessibility: You can find them in almost any pharmacy or supermarket, making them convenient for our clients in Murrieta, Temecula, and surrounding areas.
However, the key is always sparing application. A thin layer is critical to allow the skin to breathe. Make sure you don’t overapply the ointment, as this will not allow the skin to breathe, and the healing process will be delayed. Always follow your artist’s specific product advice, as they may have a preferred brand or a specific professional-grade product that complements their technique.
What happens if I accidentally get my brows wet?
It’s a common concern! While we emphasize keeping your brows dry during the initial healing phase, accidents happen. If you accidentally get your brows wet:
- Don’t Panic: First, take a deep breath! A quick splash or light sprinkle is usually not catastrophic.
- Gently Pat Dry Immediately: The moment your brows get wet, gently pat the area dry with a clean, lint-free cloth or paper towel. Do not rub or wipe vigorously, as this can dislodge pigment or irritate the skin.
- Avoid Prolonged Exposure: The real danger lies in prolonged water exposure. This can soften the scabs prematurely, leading to pigment loss, and increase the risk of infection. This is why we strictly advise against swimming, soaking in baths, jacuzzis, saunas, and steamy showers for at least 10-14 days post-procedure. When showering, keep your face away from the direct spray and consider taking cooler, shorter showers. Some of our clients even use dry shampoo and wash their hair in the sink to avoid getting their brows wet during the first few days!
Why do my brows look patchy and light after the scabs fall off?
This is perhaps the most common anxiety-inducing phase of the microblading healing journey, and we want to reassure you: it is completely normal! This stage is often referred to as the “ghosting phase” or “ugly phase,” and it’s a natural part of your eyebrow tattoo healing time.
Here’s what happens:
- Initial Darkening: Immediately after your microblading appointment, your brows will appear much darker and more defined than the final result. This is due to fresh pigment, lymph fluid, and minor swelling.
- Scabbing and Flaking: Over the next few days to a week, light scabbing and flaking will occur. As these tiny scabs fall off, they take some of the superficial pigment with them.
- The “Ghosting” Effect: Once the scabs have fallen, you might notice your brows look significantly lighter, faded, or even patchy. The pigment might appear dull, grayish, or almost non-existent. This is because a new layer of skin cells has grown over the implanted pigment, temporarily obscuring it.
- Pigment Resurfacing: Don’t fret! The pigment needs time to “bloom” or “resurface” as the deeper layers of your skin continue to heal and regenerate. Over the next few weeks (typically 4-6 weeks post-procedure), the true color will gradually emerge and settle. It’s absolutely normal for clients to have more fading in some areas after recovery, making brows look temporarily uneven. This is precisely why a touch-up appointment is so important—it allows us to perfect any areas that didn’t retain pigment as well.
Patience is a virtue during this phase! Trust the process, continue to follow your aftercare instructions, and know that your beautiful brows are on their way.
Perfect Healing for Lasting Beauty
The journey to perfect microbladed brows doesn’t end when you leave our studio. It truly begins with your commitment to diligent aftercare. As we’ve explored, proper use of microblading aftercare ointment is not just a suggestion—it’s a non-negotiable step to protect your investment and ensure stunning, long-lasting results.
Consistency is key. By gently cleansing, applying the right amount of ointment at the correct frequency, and avoiding common pitfalls, you are actively contributing to the longevity and vibrant appearance of your new brows. This meticulous care protects against potential infections, minimizes scabbing, and maximizes pigment retention, allowing those beautifully crafted hair strokes to truly shine.
For expert microblading services and personalized aftercare guidance in the Murrieta, Temecula, Menifee, Lake Elsinore, and Corona areas, trust a certified specialist like Vicky at Lavishing Eyebrows. Vicky’s perfectionist artistry and reassuring consultation process ensure that every client feels comfortable and confident in their microblading journey. We use premium US-sourced products and treat each client’s brows as unique artwork, delivering natural-looking results that restore confidence, especially for those with over-plucked, sparse, or age-thinned brows.
We’re here to guide you every step of the way, ensuring your healing process is as smooth and successful as your initial procedure.
Follow our complete Microblading Aftercare Instructions for flawless results.