Mastering Eyebrow Mapping for the Best Eyebrow Shaping
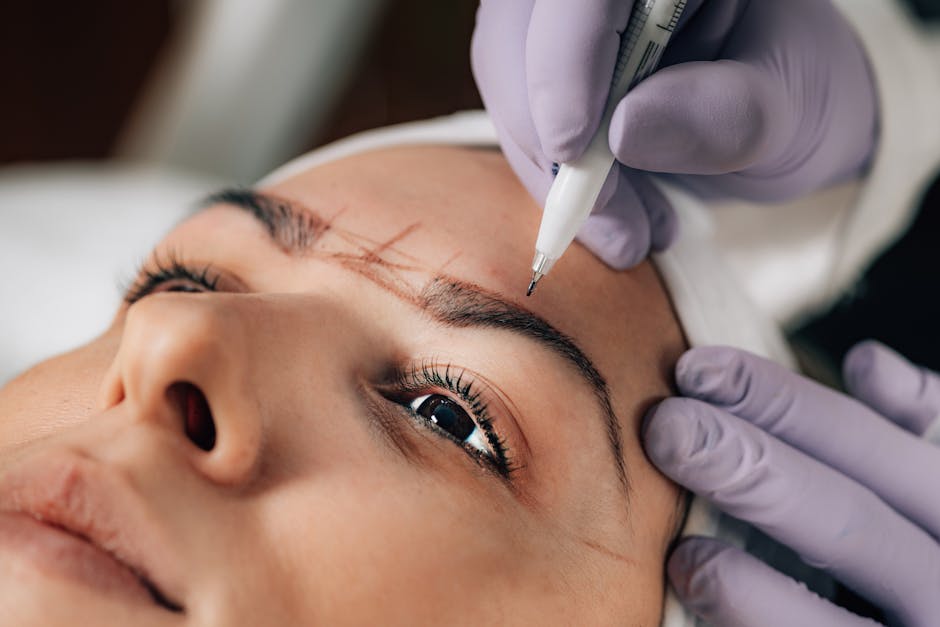
To achieve the best eyebrow shaping, you must begin with architectural brow mapping rather than plucking at random. Eyebrow mapping is a specialized technique that uses your nose, eyes, and brow bone to plot a customized framework for your face.
The most accurate method is based on classical art proportions, known as the Golden Ratio. By anchoring your brows to fixed facial landmarks, you create natural symmetry that enhances your entire face.
Here is how the three key points align:
- The Start Point: Hold a thin pencil or spoolie vertically against the middle of your nostril, extending straight upward toward your forehead. This marks where your eyebrow should naturally begin. Starting too far inward makes your nose look wider, while starting too far outward makes your eyes appear unusually far apart.
- The Arch Peak: Hold the pencil at the tip of your nose and angle it directly across the center of your pupil or iris. Where this line intersects your brow bone is your highest natural arch point. This spot provides vertical lift, giving the illusion of a mini face lift.
- The Tail End: Align the pencil from the outer corner of your nostril to the outer corner of your eye. Where the pencil lands marks where your brow tail should end.
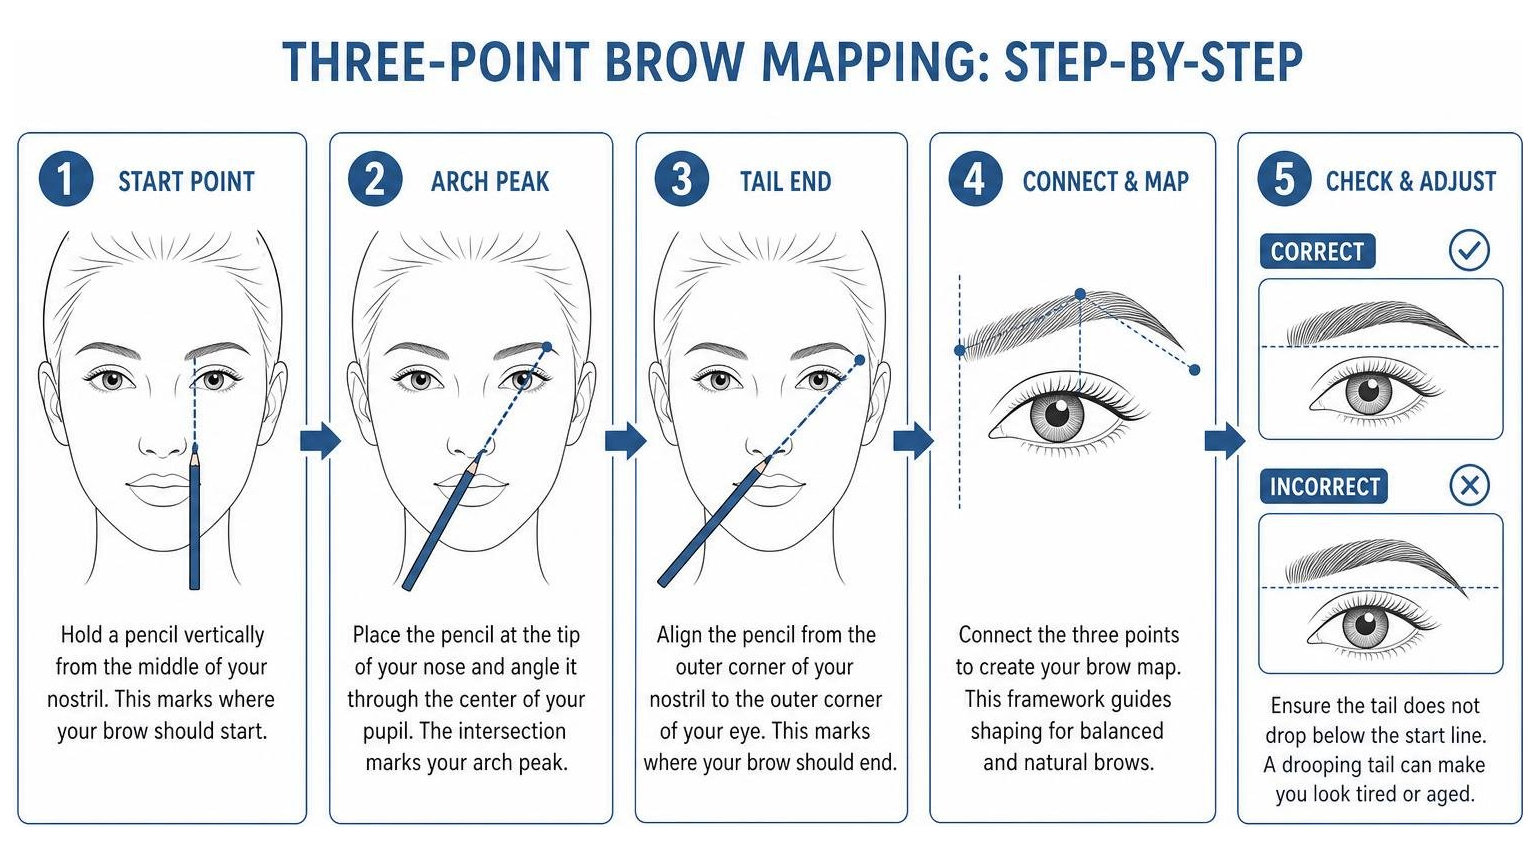
When drawing the tail, ensure it does not drop below the horizontal baseline of your brow start. A drooping tail drags down the outer corners of your eyes, creating an aged or tired expression.
Essential Tools and Products for the Best Eyebrow Shaping at Home
Achieving professional results at home requires the proper kit. Using heavy household scissors or dull, flat-edge tweezers often leads to skin pinching and patchy brows.
Before attempting any at-home grooming, gather these essential items:
- Slant-Tip Tweezers: High-quality slant tweezers allow you to grab individual coarse hairs cleanly at the root without snapping the shaft.
- Precision Eyebrow Scissors: Opt for small, straight-edge beauty scissors designed specifically for delicate trimming.
- Spoolie Brush: A firm spoolie is critical for combing hairs upward to reveal excess length before trimming.
- Microfine Eyebrow Pencil: An ultra-slim pencil lets you draw delicate, hair-like strokes in sparse areas. Select a shade that matches or is one shade lighter than your natural brow hair.
- Clear Brow Gel: A lightweight setting gel holds hairs up and outward without flaking or leaving a crunchy residue.
To refine your grooming technique, check out How to Do Eyebrows in 2026: A Simple Step-by-Step Guide for detailed shade-matching strategies, and review The Ultimate Guide to Brow Shape Consultation to learn how professional specialists analyze bone dynamics.
Step-by-Step DIY Guide to the Best Eyebrow Shaping
Once you have mapped your core anchor points and prepped your tools, follow this step-by-step technique to shape your brows without over-plucking:
- Cleanse the Skin: Wash your face to remove lingering oils, moisturizers, or foundation. Water-based pencils and tweezers stick or slip if oil is present on the skin.
- Brush upward with a Spoolie: Brush all your brow hairs straight up toward your hairline. This reveals long, unruly tips that extend past your main brow body.
- Trim Only the Tips: Take your precision scissors and snip only the extreme tips that extend above your desired upper brow line. Take tiny, millimeter-sized cuts. Never cut hairs short horizontally into the main brow, as this leaves visible gaps.
- Draw a Pencil Safety Fence: Map your start, arch, and tail with an eyebrow pencil. Draw a light outline around your desired brow perimeter. Any hair inside this boundary is off-limits; only plucking hairs that fall outside this “safety fence” protects your core shape.
- Tweeze in the Direction of Growth: Grab stray hairs outside your drawn fence line at the base and pull firmly in the direction the hair grows. This prevents broken roots and ingrown hairs. Pause every few hairs and step back two feet from the mirror to review overall balance.
- Fill and Blend: Fill in sparse areas using light, upward strokes with your pencil. Focus pigment on the arch and tail while keeping the front head airy and soft. Soften any harsh pencil lines by brushing through with a spoolie.
- Clean up with Concealer: Apply a tiny dab of cream concealer directly beneath your arch with a small angled brush and blend downward. This hides stubble and creates a crisp, lifted brow line.
For additional DIY styling hacks, read through the comprehensive Perfect Brows Guide.
Finding the Ideal Eyebrow Shape for Every Face Shape
While your underlying brow bone dictates where your brow sits, tailoring your arch to complement your face shape balances your overall facial features:
- Round Face Shape: Soft, rounded faces benefit from structured brows with high, angled arches. A defined arch creates vertical length, making the face appear slender. Avoid overly rounded or circular brow shapes, as they emphasize facial roundness and draw attention to dark under-eye circles.
- Square Face Shape: A square face has a strong, angular jawline and broad cheekbones. To balance these strong angles, opt for softly curved brows with a subtle, lifted arch. Avoid sharp, pointy arches that compete with your jawline.
- Oval Face Shape: Considered visually balanced, oval faces suit almost any brow shape. A soft, gently angled arch with a full body maintains this natural harmony without distorting facial proportions.
- Heart Face Shape: Heart-shaped faces feature a wide forehead tapering down to a delicate, pointed chin. Softly rounded or slightly curved arches help balance a pointed chin without adding heavy width across the forehead.
- Rectangle / Long Face Shape: Long or rectangular faces feature vertical length. Flat, straight brows with extended horizontal tails help visually widen the face, cutting down on vertical length for a balanced look.
To dive deeper into matching arches to facial structures, explore Vogue’s Official Guide To The Best Eyebrow Shape For Your Face and review our detailed local advice in The Temecula Guide to Finding Your Perfect Brow Shape.
Balancing Full Brows versus Thin Brows
The debate between full brows and thin brows comes down to scale, feature balance, and individual facial structure. Ultra-thin brows can look flattering on delicate features or petite facial proportions where thick brows might overwhelm the face. However, overly plucking brows down to thin lines often ages the face prematurely.
Full, lush brows are universally flattering because they frame the eyes and create a youthful, rested appearance. As we age, our natural brow density thins out. Maintaining soft fullness adds visual volume to the upper face.
If you are navigating mature or thinning brows, explore our expert styling advice in The Best Eyebrows for Older Ladies: Tips for a Natural Lift.
Comparing Eyebrow Shaping Techniques: Tweezing, Trimming, and Precision Maintenance
Choosing the right hair removal and shaping technique depends on your skin sensitivity, budget, and desired precision.
| Shaping Method | How It Works | Ideal For | Longevity | Risk Level |
|---|---|---|---|---|
| Tweezing | Plucks individual hairs from the root using metal precision tips. | At-home maintenance and stray cleanup. | 2–3 Weeks | Low (if you avoid over-plucking) |
| Waxing | Applies warm wax to strip away rows of hair quickly. | Thick, coarse hair and quick cleanups. | 3–4 Weeks | Medium (can irritate sensitive or thin skin) |
| Threading | Uses a twisted cotton thread to lift lines of hair from the follicle. | Sensitive skin and crisp perimeter lines. | 3–4 Weeks | Low (chemical-free, gentle on skin) |
| Shaving / Dermaplaning | Uses a single-blade razor to trim surface hair at skin level. | Quick, pain-free daily or weekly touch-ups. | 3–7 Days | Low (hair grows back quickly) |
| Semi-Permanent Makeup | Implants pigments into skin layers to mimic full, real hair. | Over-plucked, sparse, or asymmetrical brows. | 1–3 Years | Very Low (when done by a certified specialist) |
For targeted advice on correcting uneven arches using these techniques, consult our guide Say Goodbye to Asymmetrical Arches: Your Uneven Eyebrow Solutions.
Professional Brow Services and Long-Term Enhancement Solutions
When daily penciling becomes time-consuming or over-plucking has damaged your natural hair growth, professional permanent makeup (PMU) offers long-lasting, natural-looking solutions.
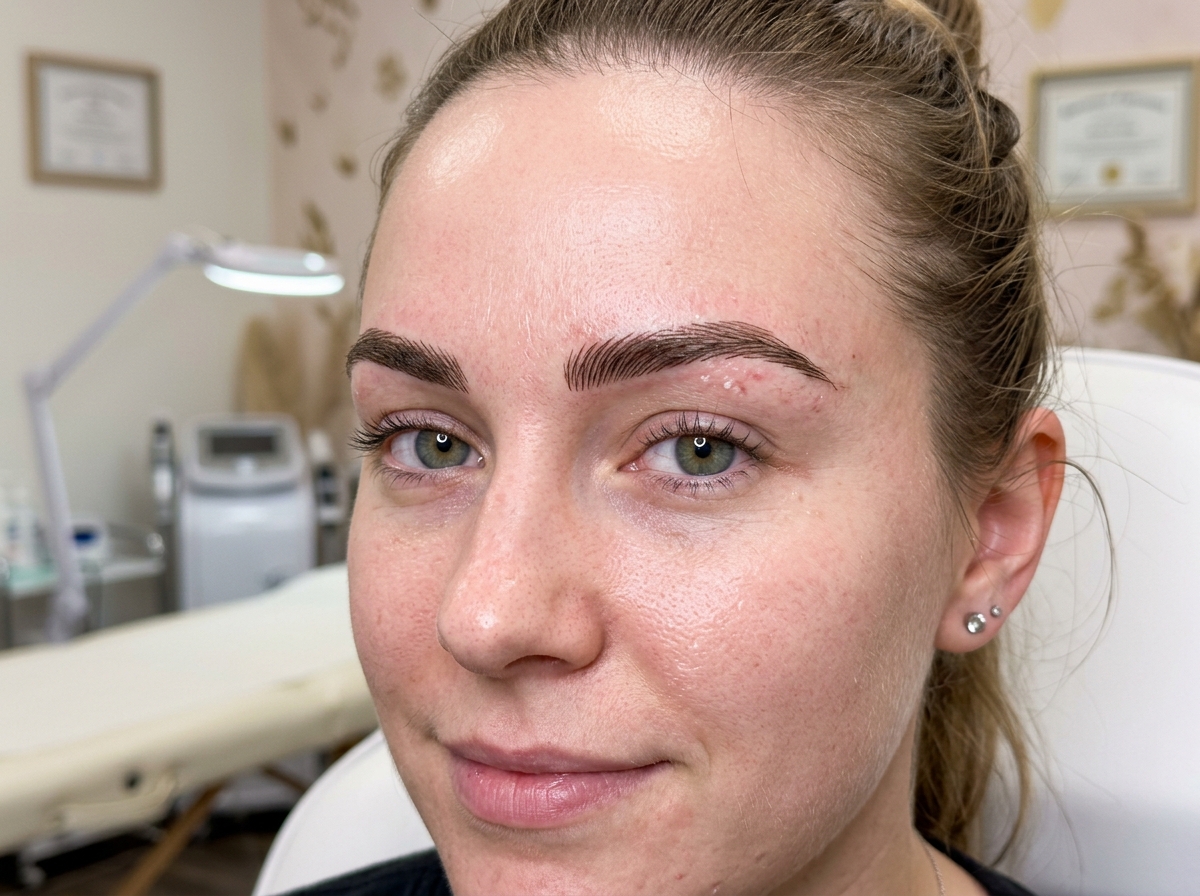
At Lavishing Eyebrows in Murrieta, CA, certified specialist Vicky customizes advanced PMU techniques to match your skin type, bone structure, and lifestyle:
- Microblading: Uses a fine manual blade to deposit hair-like pigment strokes into the upper dermis. Ideal for normal-to-dry skin types wanting to fill gaps with natural stroke work.
- Nano Brows: Utilizes an ultra-fine digital machine needle to create crisp, realistic hair strokes. Gentle on the skin and suitable for oily, textured, or mature skin types where traditional microblading might blur.
- Powder / Ombre Brows: Employs soft machine shading to create a soft, powdered makeup finish. Excellent for clients who prefer a styled look or need long-lasting coverage over oily skin.
- Combination / Blade & Shade: Merges realistic hair strokes at the front head with powder shading through the arch and tail, delivering both natural texture and dense definition.
For a deep dive into realistic stroke artistry, read Achieving Natural-Looking Brows with 3D Eyebrow Tattoo and The Art of Shading with Microblading: Enhancing Your Brows.
Professional Maintenance Schedules and Upkeep
Keeping your brows looking polished requires a consistent care schedule:
- Professional Clean-Ups (Every 2 to 4 Weeks): A quick visit to clean stray hairs around your established shape.
- Full Professional Reshaping (Every 6 to 8 Weeks): Allows hair growth cycles to sync, letting your specialist reset your natural arch.
- PMU Color Touch-Ups (Every 12 to 36 Months): Semi-permanent treatments like microblading or powder brows gradually fade over time and require a color boost to retain their sharpness and depth.
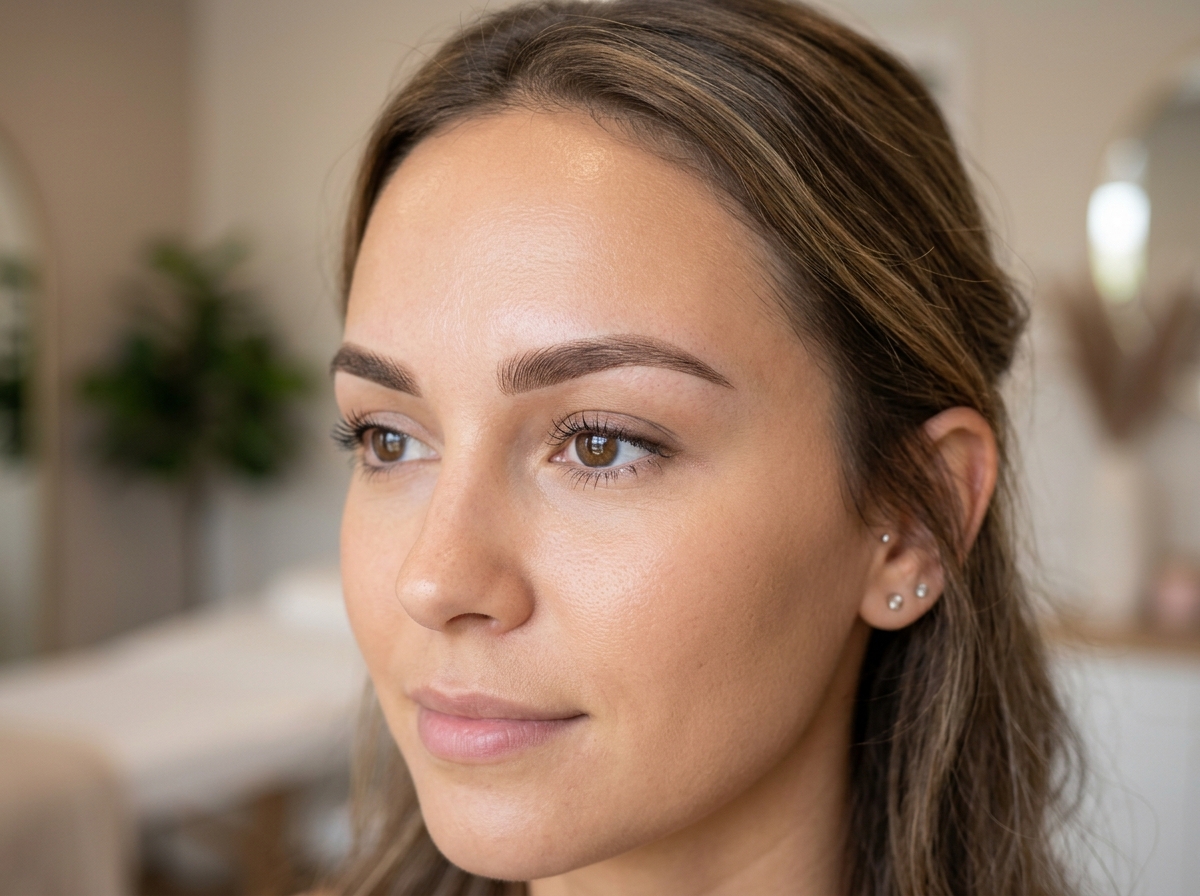
Between appointments, avoid plucking growing stubble. Instead, camouflage stubble using a cream concealer, and apply a nourishing eyebrow conditioning serum at bedtime to support healthy follicle growth.
Common Eyebrow Shaping Mistakes and How to Avoid Them
Even with the best intentions, it is easy to make mistakes when shaping your brows at home. Here are common errors and how to avoid them:
- Using Magnified Mirrors: Magnified mirrors warp your facial perspective, making it easy to focus on tiny individual hairs until you have accidentally plucked away your whole arch. Always use a standard mirror at arm’s length.
- Chasing Identical Twin Symmetry: Brow bones, muscle dynamics, and eye shapes are naturally asymmetrical. Over-plucking to force identical brows thins out your arches. Aim for harmonious sisters, not carbon-copy twins.
- Creating Blocky, Dark Fronts: Applying heavy pencil lines at the front head makes brows look harsh and unnatural. Keep the front soft, feathered, and lighter than the tail.
- Choosing the Wrong Shade: Selecting a brow pencil that is too dark or overly warm adds harshness to your face. Stick within one shade of your natural brow hair.
- Plucking Above the Arch: Over-tweezing top hairs can collapse your natural support structure, causing the brow to look flat or droopy.
To learn more about preserving your natural brow arch, read How to Shape and Define Your Brows at Home Like an Expert.
Frequently Asked Questions About Eyebrow Shaping
How often should I shape or groom my eyebrows?
For standard grooming, tweeze stray hairs outside your mapped safety fence once a week. Schedule a professional shaping session every 4 to 6 weeks to maintain clean perimeter lines and allow your natural hair growth cycle to reset.
How do I fix asymmetrical or uneven eyebrows?
Start by identifying which brow sits higher or has a stronger arch. Use eyebrow mapping to locate where the lower brow needs height, and fill in sparse gaps using light pencil strokes. Avoid plucking the higher brow down to match the lower one. If muscle movement causes noticeable asymmetry, semi-permanent makeup can balance both brows without sacrificing hair density.
What is the best way to grow out over-plucked sparse brows?
Put your tweezers away and hide your magnifying mirror for at least 6 to 12 weeks. Apply a peptide-rich brow conditioning serum nightly to nourish dormant hair follicles. While waiting for natural hair regrowth, fill sparse areas with fine pencil strokes or consult a specialist about semi-permanent microblading or nano brows.
Conclusion
Achieving the best eyebrow shaping comes down to honoring your unique bone structure rather than chasing fleeting social media trends. By mastering three-point eyebrow mapping, using precision tools, and matching your arches to your face shape, you can transform your brows into an elegant frame for your face.
If you are tired of filling in sparse areas every morning, or if past over-plucking has left your arches uneven, expert help is available. At Lavishing Eyebrows, Vicky provides personalized consultations in a warm, reassuring environment, crafting natural-looking microblading, nano brows, and powder brows tailored to your unique skin type and style.
Ready to transform your arches with long-lasting precision? Explore the Complete Guide to Microblading in Temecula and book your consultation with us today!